Choosing the right pallet rack shelving starts with the goods you store, not the rack’s appearance. A pallet of bottled drinks creates different demands from cartons of seasonal clothing. Record each load’s weight, dimensions, and pallet condition. Then check aisle width, ceiling height, floor condition, and the turning space your lift truck needs. Small details matter. A beam that clears one pallet may obstruct another. A plan that fits on paper may feel cramped in a busy aisle.
For this introduction, the following is an illustrative quote from a fictional composite specialist, not a sourced statement: “Choose the rack around the load, the equipment, and the people who use it.” That principle keeps the decision practical. Compare selective, drive-in, and other rack configurations against stock rotation, access needs, and available space. Check manufacturer specifications and have qualified professionals assess capacity and installation requirements. Do not guess at load ratings. Your inventory may change, too, so leave room to review the layout as operations evolve. Even a careful plan can miss a daily bottleneck. Notice where workers pause, pallets overhang, or turning becomes awkward. Those observations can reveal what a drawing cannot.
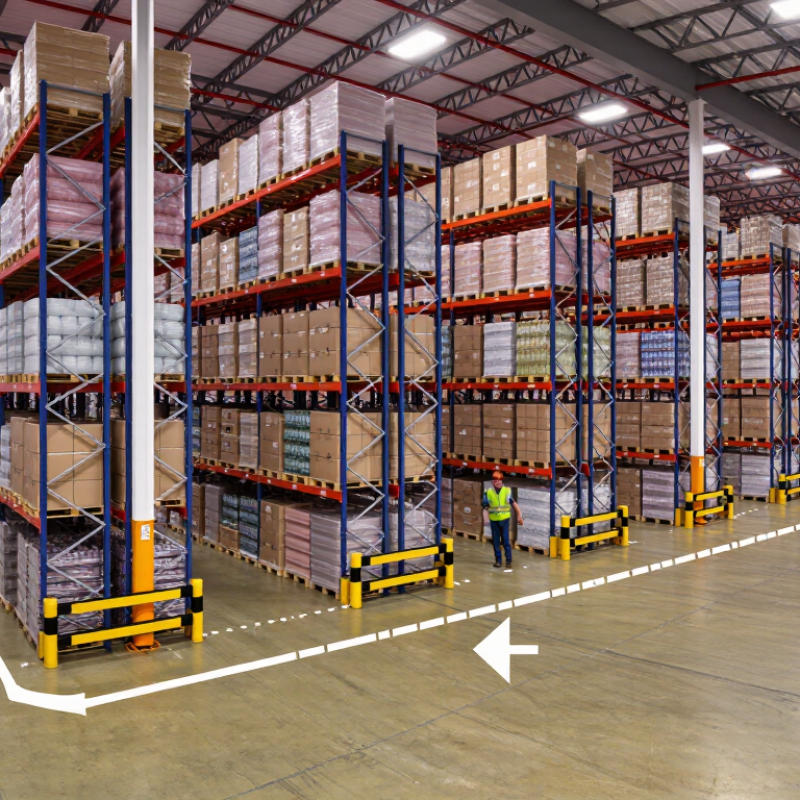
Before comparing pallet rack styles, measure what the warehouse actually needs to store. Record pallet dimensions, loaded weights, and the number of pallets for each product. Check whether loads are uniform. A few oversized pallets can change beam spacing and reduce usable positions.
Walk the building with a tape measure. Note clear ceiling height, columns, doorways, sprinkler lines, and the narrowest aisle. Measure around obstructions, not just along empty walls. Forklift turning space matters. So does room for workers to inspect and retrieve loads safely. Check the floor condition and confirm its load capacity with a qualified professional; rack loads concentrate weight on small areas. I have seen plans look efficient on paper, then lose space when real equipment enters the aisle. That happens.
Look at inventory movement, too. Fast-moving items may need easy access, while slow stock can sit in less convenient locations. Leave some capacity for seasonal peaks or changing pallet sizes. Do not fill every bay on day one. That sounds wasteful, but a little flexibility can prevent awkward reshuffling later. Document the assumptions behind your measurements, including expected load weights. They may need revision. A warehouse is rarely as tidy as its first layout drawing.
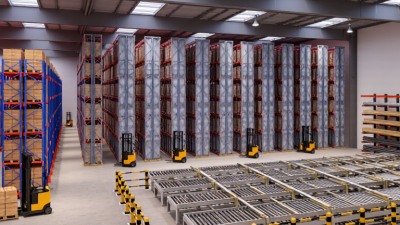
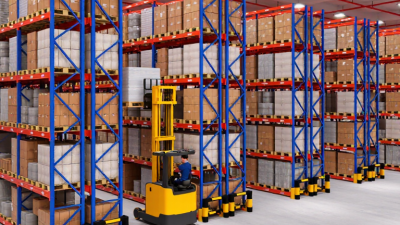
Selective pallet rack gives direct access to every pallet, making it practical for warehouses with many SKUs and frequent order picking. It uses aisle space, though.
Drive-in rack stores pallets several deep and suits large quantities of a few products. Forklifts enter the lanes, so operators need clear procedures and careful turning.
Push-back rack also stores pallets deep, but carts move loads toward the aisle. It can improve storage density while making lane-level inventory checks less straightforward.
Pallet flow rack uses rollers to move loads from the loading side to the picking side, supporting first-in, first-out rotation for dated goods.
Tips: Measure pallet dimensions, load weights, forklift turning space, and ceiling clearance before comparing layouts. Confirm beam and frame ratings with a qualified rack professional, and check the floor condition. Small measurement errors matter.
On a busy shift, the best choice is often the rack that keeps common picks easy, not the one with the tightest layout. A narrow aisle may look efficient on paper but feel awkward with actual equipment. Consider how many pallets each SKU occupies and how quickly stock moves. Flow lanes need inspection, while drive-in lanes require consistent loading habits. The right trade-off can vary by product and shift.
How to Choose the Right Pallet Rack Shelving?
Calculate Load Capacity and Safety Requirements
Start with the heaviest pallet, not the average one. Include the product, pallet, and any packaging; then total the load on each beam level and bay. Rack Manufacturers Institute guidance stresses that capacity depends on the rack’s specific configuration. Beam length, upright frame, and shelf spacing all matter. Loads should be distributed as the rack was designed to carry them. Check the manufacturer’s capacity information, and confirm the floor can support the loaded system. Small details count.
BLS reported 4.8 recordable injury and illness cases per 100 full-time workers in the transportation and warehousing sector in 2022. That figure is not specific to rack failures, but it underscores why safe handling deserves attention. Keep rack capacity labels visible, and train forklift operators to avoid impacts. Inspect beams, uprights, anchors, and floor connections for bends, looseness, or fresh damage. One planning blind spot is future change: heavier stock or a new pallet size can alter loads. Recheck the calculations when inventory or rack layout changes. A neat spreadsheet is not enough. The real setup may differ.
| How to Choose the Right Pallet Rack Shelving? - Calculate Load Capacity and Safety Requirements | ||||||
|---|---|---|---|---|---|---|
| Illustrative load-planning examples and essential safety checks | ||||||
| Example Configuration | Beam Length | Pallets per Beam Level | Illustrative Load per Pallet | Beam-Pair Capacity per Level | Loaded Beam Levels | Illustrative Bay Load |
| Standard selective rack | 96 in (8 ft) | 2 | 2,000 lb | 5,000 lb | 3 | 12,000 lb |
| Longer-span selective rack | 108 in (9 ft) | 2 | 1,800 lb | 4,600 lb | 3 | 10,800 lb |
| Wide-span selective rack | 120 in (10 ft) | 2 | 1,600 lb | 4,000 lb | 4 | 12,800 lb |
| Three-pallet beam level | 144 in (12 ft) | 3 | 1,200 lb | 4,200 lb | 3 | 10,800 lb |
| How the examples are calculated: Beam-level load equals the number of pallets multiplied by the load per pallet. Illustrative bay load equals beam-pair capacity per level multiplied by the number of loaded beam levels; floor-level loads are excluded. Example capacities are for planning comparisons only, not certified ratings. | ||||||
| Capacity and Safety Requirements to Verify Before Use | ||||||
| Check | What to Confirm | Why It Matters | Action | |||
| Actual unit load | Include the pallet, product, packaging, and any attachments; use the maximum expected weight. | A pallet’s gross load—not product weight alone—determines the rack demand. | Weigh representative loads and allow for future changes in inventory. | |||
| Beam capacity | Check the rated capacity for the exact beam model, length, connection, and load arrangement. | Capacity can change with beam span, loading pattern, and component specifications. | Use the manufacturer’s load chart or have a qualified rack designer verify it. | |||
| Upright frame and bay capacity | Verify frame capacity for the installed height, beam elevations, bracing, and base conditions. | Uprights carry accumulated loads from the beam levels above. | Confirm the complete rack configuration, including the lowest beam level and anchors. | |||
| Load distribution | Confirm whether loads are evenly distributed, concentrated, or supported by multiple pallets. | Uneven or concentrated loads can exceed component limits even when total weight appears acceptable. | Follow the rack supplier’s permitted loading pattern; do not assume a beam rating applies to every pattern. | |||
| Pallet fit and clearances | Check pallet dimensions, beam spacing, handling clearances, and load overhang against the rack design. | Poor fit can cause impact, unstable storage, or interference with adjacent loads. | Set clearances for the specific pallet, load, forklift, and operating method; verify them on site. | |||
| Condition and protection | Inspect for bent or damaged members, loose connections, missing locking devices, and impact damage. | Damage or displaced components can reduce the rack’s ability to carry its rated load. | Restrict access to damaged areas and arrange inspection and repair by a qualified person. | |||
| Operating rules | Check load notices, forklift procedures, floor condition, anchorage, and applicable local requirements. | Safe use depends on the installed rack, building, equipment, and workplace procedures. | Display approved load information and train operators to place and remove loads carefully. | |||
| Important: Actual allowable capacities vary by rack manufacturer, component details, installation, and local requirements. Obtain the approved load ratings for the installed system; do not use these illustrative figures to design, rate, or load a rack. | ||||||
A reliable pallet rack layout starts with the building, the inventory, and the equipment that will move between them. Measure clear ceiling height, columns, doors, sprinklers, and floor obstructions before placing a single bay. Then map pallet sizes, load weights, and expected stock movement. Details matter. Rack beams and frames must suit the loads, while clearances should be checked against applicable safety requirements.
Aisle width is not just a number copied from a standard plan. Check the lift truck’s turning radius, load length, and operating method, then test the route on a scaled drawing. Allow room for a pallet to enter a bay without striking uprights or nearby stock. Measure twice. Narrow aisles can increase storage density, but they may slow handling or require different equipment. Confirm the chosen width with equipment specifications and a qualified rack planner.
Walk the proposed layout as an operator would: from receiving, through storage, to picking and dispatch. Mark pedestrian crossings, staging areas, and places where trucks must turn or reverse. Keep emergency routes and access to building services unobstructed. A common planning miss is leaving too little space near a busy dock. That can create daily congestion. Revisit assumptions after a trial period; real traffic patterns may expose flaws the drawing missed.
Plan rack layout, aisle widths, and equipment access
These indicative planning ranges show how equipment choice affects clear aisle width. Confirm requirements against the selected truck’s specifications, pallet dimensions, load overhang, and site conditions before finalizing a rack layout.
Installation, compliance, and future expansion deserve attention before you compare rack prices. Measure the slab, ceiling height, sprinkler clearance, aisle widths, and turning space for the actual lift trucks. Confirm the floor can carry the planned loads; a concrete surface that looks sound may still need engineering review. Measure twice. Then check that installers follow the rack manufacturer’s design drawings and the applicable steel-storage-rack standard, such as ANSI MH16.1.
Compliance is practical, not paperwork alone. OSHA’s 29 CFR 1910.176(b) requires stored materials to remain stable and secure against sliding or collapse. The Bureau of Labor Statistics reported 4.8 recordable injury and illness cases per 100 full-time workers in warehousing and storage in 2023. That figure is not rack-specific, but it underlines why clear aisles, visible load signs, and regular damage checks matter. Bent uprights should trigger a prompt assessment, not a guess. Small delays happen.
Plan for change while the layout is still on paper. MHI’s 2024 Annual Industry Report found that 55% of respondents planned to invest more than $1 million in supply-chain technology over the following two years. Leave room for new handling equipment, different pallet sizes, or a future picking system; verify each change against rack capacity and clearances. Expansion plans are often imperfect. That is exactly why adjustable beam levels and documented load limits can be more useful than filling every bay on day one.